How and what you can draw in Word - from the simplest shapes to complex diagrams. Drawing in Word Drawing three-dimensional figures
Microsoft Word can be used not only as a powerful text editor for composing documents, but also as a tool for creating illustrations, graphic notes, and even full-fledged vector drawings. To do this, there are a large number of functions and settings for drawing in Microsoft Word.
Enabling the Drawing Menu
Word has a built-in set of special tools, including pencil drawing. But the tab with them is not listed on the Quick Access Toolbar by default. To enable the drawing menu, click on the " File" and go to the tab " Options».
In the window that opens, click on the line “ Customize your feed». 
Next, check the box next to the item called “ Drawing». 
After that, apply the changes by pressing the button “ OK». 
Now, after closing the window " Options» The drawing menu will appear on the Quick Access Toolbar. 
Interface overview
When you open the tab " Drawing»Several types of parameters and functions are available, used for drawing manually or using templates, where you can change the color, size and erase what you have drawn.
Basic Tools
The main tools include three functions that are required for the drawing process in Word. This " Choose», « Draw with your finger" And " Eraser». 
Option " Choose” indicates a specific graphic already placed in the document.
Function " Finger drawing» is focused on touch devices; for use on a regular screen, a cursor will be used instead of gestures and the process itself will resemble drawing with a pencil.
When you click on " Eraser» a tool will open to erase already drawn lines or an entire part of the drawing.
In addition, a set of special tools is used.
Feathers
This group of tools provides opportunity to choose any pen for drawing in Word 2007, 2010, 2016 and other versions. They are all different thickness and type drawn line. In order to view each pen separately, you need to go to the “ More" In the window next to the lines “ Thickness" And " Color» You can adjust the parameters of each pen. 
Conversion Tools
These tools are used to graphic editing text. 
» makes it possible to trace already written text with a pen of any color. Thanks to this option, you can highlight and underline parts of the text, create notes and indexes. Chapter " Convert to Shapes» allows you to turn any drawing into a separate object by changing its color, size and position. 
To turn a hand sketch into a separate image, select the object by clicking on " Choose" and go to the section " Convert».
Playback
The entire drawing process in the document is recorded by the program and is available for viewing after the drawing is ready. In order to review the process of creating a drawing, you need to go to the “ Playback» select the item «». 
Drawing Tools
When creating a canvas, the menu “ Format", where additional options are located.
The menu of the same name contains list of objects, added to the canvas: rectangles, flowcharts, stars, wavy and straight lines, callouts and elements, circles, shapes intended for equations. 
To insert an object or lines for drawing, you need to select from the list of proposed ones and, having specified the starting point on the canvas, stretch with cursor to the required size. If you simply click on it in the insertion window, the program itself will place the element on the sheet, using a standard size. 
Changing the style
In the " Shape styles» the color of the object, its texture and frames change. To fill with color, click on the line “ Fill" on the menu " Format» and select the appropriate options. 
By going to the "" tab, you can adjust the backlight, anti-aliasing, add a shadow or change the volume. 
WordArt Styles
This item is for applying effects only to text, which was added to the figure. The WordArt section options give you the ability to add color effects and allow you to change the size, slope, curvature, and perspective of the lettering. 
Editing text
After selecting the desired style from the list of suggested ones, a field will appear with a standard example of text that can be replaced with yours. Here you can change the tilt and direction of the text, add a shadow, glow and frame to it. 
Using these tools, you can change the alignment, position, and rotation of an element in space. This can be done in two ways - use standard template settings or ask arbitrary direction. To do this, you just need to drag the mouse on the rounded arrow above the object. 
This menu is for changing the size of the figure. The indicator can be adjust manually, using the arrows in the value box or stretching the boundaries with the mouse to the required limit. 
Drawing with Shapes
To draw a drawing with shapes in Word, first create a working canvas: click on “ Insert" in the quick access panel and by going to the menu " Figures", select the lowest line called "". 
After this command, a canvas will appear on the document page, the size of which can be adjusted by stretching the edges with the mouse. 
To create an object on a new canvas, go to the “ Insert" and select the item " Figures" Click on the one you want and press the "" button on your keyboard. Shift"and stretch it to the desired size. 
On one canvas you can place several different figures of different sizes and colors, which allows you to create compositions and simple vector drawings from them. 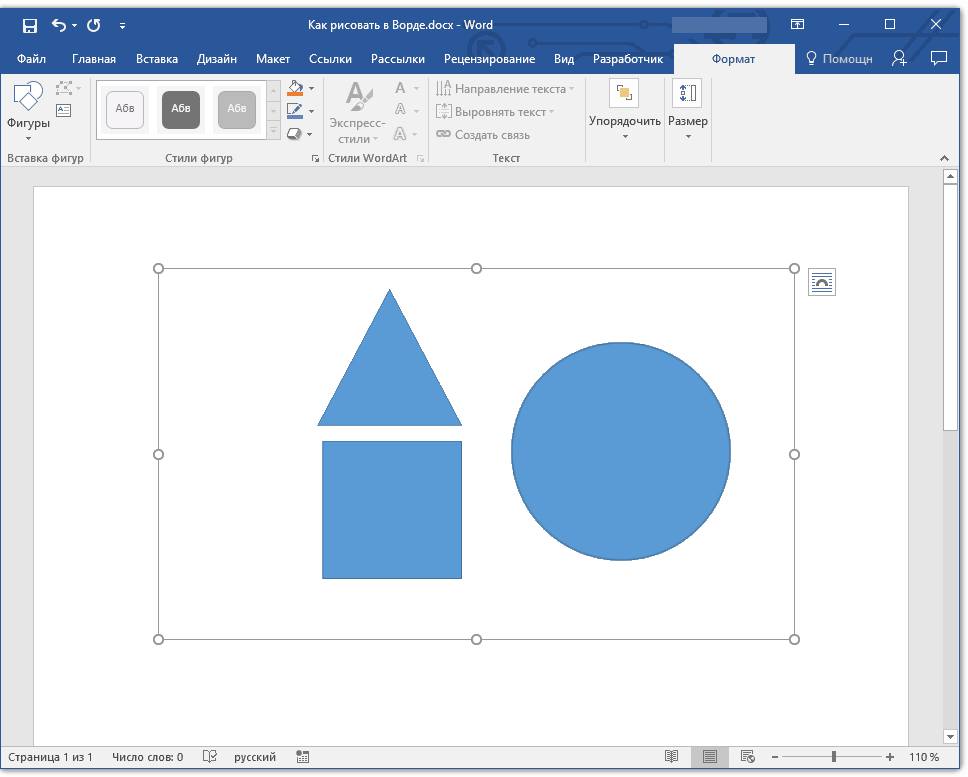
When you press the button " Change figure» you can replace the selected element with any other from the list. To change the tilt and perspective of an object, go to the “ Start changing nodes"and change its anchor points in space.
Drawing three-dimensional figures
In addition to the simplest objects, the program can also create three-dimensional images. To do this, you need to draw a regular figure and go to the menu “ Figure format", click on the button " Effects" In the new window, select the line “ Format of volumetric figures» and assign your parameters - depth, contour, material or lighting. 
To create volumetric figures in older versions of the program, you need to first create a regular one, then click on “Volume” and select the desired format in a new window. 
Advanced Formatting Options
For more detailed editing of the image, you need to go to the menu called “Shape Format”, in which additional formatting options will become available: borders, fill, as well as properties and layout.
Paragraph " Shading and borders» allows you to adjust and change the texture or fill of the lines of the picture and its entire area. In the effects tab you can adjust color, size, transparency, shadow and blur. " Layout and properties» makes it possible to adjust the correct position of the image and the text that will surround it.
MS Word is, first of all, a text editor, however, you can also draw in this program. Of course, you shouldn’t expect such opportunities and ease of use as in specialized programs originally designed for drawing and working with graphics. However, to solve basic problems, a standard set of tools will be enough.
Before we look at how to make a drawing in Word, it should be noted that you can draw in this program using two different methods. The first is manually, similar to what happens in Paint, although a little simpler. The second method is drawing using templates, that is, using template shapes. You won’t find an abundance of pencils and brushes, color palettes, markers and other tools in Microsoft’s brainchild, but it’s still quite possible to create a simple drawing here.
Microsoft Word has a set of drawing tools that are similar to those in the standard Paint integrated into Windows. It is noteworthy that many users are not even aware of the existence of these tools. The thing is that the tab with them is not displayed on the program’s quick access panel by default. Therefore, before you start drawing in Word, you and I will have to display this tab.
1. Open the menu "File" and go to the section "Options".

2. In the window that opens, select "Customize the feed".

3. In the section "Main Tabs" check the box next to the item "Drawing".

4. Click "OK" for the changes you made to take effect.

After closing the window "Options" a tab will appear on the Quick Access Toolbar in Microsoft Word "Drawing". We will look at all the tools and features of this tab below.

Drawing Tools
In the tab "Drawing" in Word, you can see all the tools with which you can draw in this program. Let's take a closer look at each of them.
Tools
This group contains three tools, without which drawing is simply impossible.

Choose: allows you to point to an already drawn object located on the document page.
Draw with your finger: Designed primarily for touch screens, but can also be used on regular ones. In this case, the cursor pointer will be used instead of the finger - just like in Paint and other similar programs.

Note: If you need to change the color of the brush you are painting with, you can do this in the adjacent group of tools - "Feathers" by pressing the button "Color".
Eraser: This tool allows you to erase (delete) an object or part of it.

Feathers
In this group you can choose from a variety of available pens, which differ primarily in line type. By clicking on the "More" button located in the lower right corner of the styles window, you can see a preview of each available pen.

Next to the styles window are tools "Color" And "Thickness", allowing you to select the color and thickness of the pen, respectively.

Convert
The tools located in this group are not intended specifically for drawing, or even for these purposes at all.

Editing by hand: Allows you to edit documents using a stylus. Using this tool, you can manually circle text fragments, underline words and phrases, point out errors, draw directional arrows, etc.

Convert to Shapes: Having sketched a figure, you can transform it from a drawing into an object that can be moved around the page, you can change its size and perform all the manipulations that are applicable to other drawing figures.

To convert a sketch into a figure (object), you just need to point to the drawn element using the tool "Choose" and then press the button "Convert to Shapes".
Handwritten fragment in mathematical expression: We have already written about how to add mathematical formulas and equations in Word. Using this group tool "Convert" You can enter into this formula a symbol or sign that is not in the standard set of the program.

Playback
By drawing or writing something with a pen, you can enable a visual representation of that process. All it takes is the press of a button "Play Handwriting" located in the group "Playback" on the Quick Access Toolbar.

Actually, we could end here, since we have looked at all the tools and capabilities of the tab "Drawing" Microsoft Word programs. But you can draw in this editor not only by hand, but also according to templates, that is, using ready-made shapes and objects.
On the one hand, this approach may be limited in terms of capabilities, on the other hand, it provides a much wider choice of tools for editing and designing the created drawings. Read more about how to draw shapes and draw using shapes in Word.
Drawing with Shapes
It is almost impossible to create a drawing of any shape, with roundings, variegated colors with smooth transitions, shades and other details using this method. True, often such a serious approach is not required. Simply put, don’t make high demands on Word—it’s not a graphics editor.
Adding a Drawing Area
1. Open the document in which you want to make a drawing, and go to the tab "Insert".

2. In the illustration group, click on the button "Shapes".

3. In the drop-down menu with available shapes, select the last item: "New canvas".

4. A rectangular area will appear on the page in which you can start drawing.

If necessary, change the size of the drawing box. To do this, pull one of the markers located on its border in the desired direction.
Drawing tools
Immediately after adding a new canvas to the page, a tab will open in the document "Format", which will contain the main drawing tools. Let's take a closer look at each of the groups presented on the quick access panel.
Inserting shapes
"Shapes"— by clicking on this button, you will see a large list of shapes that can be added to the page. All of them are divided by thematic groups, the name of each of which speaks for itself. Here you will find:
- Lines;
- Rectangles;
- Basic figures;
- Curly arrows;
- Figures for equations;
- Flowcharts;
- Stars;
- Callouts.

Select the appropriate type of shape and draw it by left-clicking on the starting point. Without releasing the button, specify the end point of the shape (if it is a straight line) or the area that it should occupy. After this, release the left mouse button.

"Change figure"— by selecting the first item in the menu of this button, you can literally change the shape, that is, instead of one, draw another. The second item in the menu of this button is "Start changing nodes". By selecting it, you can change the nodes, that is, the anchor points of specific places of the figure (in our example, these are the outer and inner corners of the rectangle.

"Add caption"— this button allows you to add a text field and enter text into it. The field is added in the location you specify, but can be freely moved around the page if necessary. We recommend that you first make the field and its edges transparent. You can read more about how to work with a text field and what you can do with it in our article.
Shape styles
Using the tools in this group you can change appearance drawn figure, its style, texture.
Once you select the appropriate option, you can change the shape's outline color and fill color.

To do this, select matching colors in the button dropdown menu "Shape Fill" And "Figure Outline", which are located to the right of the window with template shape styles.

Note: If you are not happy with the default colors, you can change them using the option "Other colors". You can also choose a gradient or texture as the fill color. In the “Outline Color” button menu, you can adjust the line thickness.

"Figure Effects" is a tool with which you can further change the appearance of the figure by choosing one of the proposed effects. Among them:
- Shadow;
- Reflection;
- Backlight;
- Smoothing;
- Relief;
- Turn.

Note: Parameter "Turn" is available only for volumetric figures; some effects from the above sections are also available only for figures of a certain type.

WordArt Styles
The effects in this section apply exclusively to text added using the button "Adding a caption" located in the group "Insert a Shape".
Text
Similar to WordArt styles, effects are applied exclusively to text.
Arrange
The tools in this group are designed to change the position of a figure, align it, rotate it, and other similar manipulations.

Rotating a figure is performed in the same way as rotating a drawing - by a template, strictly specified or arbitrary value. That is, you can select a standard rotation angle, specify your own, or simply rotate the shape by pulling the circular arrow located directly above it.


In addition, using this section, you can superimpose one shape on another, just as you can do with drawings.
In the same section, you can wrap text around a shape or group two or more shapes.
Lessons on working with Word:
How to Group Shapes
Wrapping text around a picture
Note: Group Tools "Arrange" in the case of working with figures, they are absolutely identical to those when working with drawings; with their help, you can perform exactly the same manipulations.
Size
The single tool of this group has only one option - changing the size of the figure and the field in which it is located. Here you can set the exact value of the width and height in centimeters or change it step by step using the arrows.

In addition, the size of the field, like the size of the figure, can be changed manually using markers located along the contour of their borders.

Note: To exit drawing mode, press "ESC" or left-click in an empty area of the document. To return to editing and open a tab "Format", double-click on the picture/shape.
That's all, from this article you learned how to draw in Word. Do not forget that this program is primarily a text editor, so you should not assign too serious tasks to it. Use specialized software for such purposes - graphic editors.
When choosing a text editor for work, you are not planning to write landscapes and portraits. This is currently impossible to do. But draw the simplest scheme, inserting a map into the document and marking the required place on it will be quite possible. The text editor has enough tools to solve the problem how to draw in Word.
Features of drawing in Word 2003
If you still prefer Word 2003, you'll need to enable this feature before you start drawing. To do this, select the “View” menu and in the panel that opens, check the “Drawing” box. A panel has appeared at the bottom of the document with which you can draw. The process occurs according to the following scheme: by clicking, the required figure is selected. Using the cursor in the document, give it the required dimensions.
In Word 2007 and later versions, drawing is easier, while providing opportunities to discover your talents and gain experience on the subject. how to draw in Word more.
Drawing in Word 2007
The work begins with the menu. In the top toolbar, select the “Insert” option. The operation is easy to remember, because it is the insertion of a picture or figure that will be performed.
In the panel that opens, click on the inscription “Shapes”. Select “New Canvas” from the drop-down menu. You can insert drawings without creating a canvas, but in this case it will be difficult to install the figure in the required place.
The next stage in understanding the issue how to draw in Word directly concerns the drawing.
Among the available shapes, select the required one, click on it with the cursor, thus activating it, and draw while holding down the left key in the window area.
Working with Shapes
The text editor provides a wide range of options for working with shapes. It can be moved, resized, highlighted with any outline, and its transparency can be changed from 0 to 100%. You can change the rotation angle and color. For all these operations, it is enough to activate the figure and change the parameters through the options in the menu.

In order to insert an inscription into a figure, use the right mouse button to go to the “Add text” option. In the same way, by activating a shape using the right key, you can set its order relative to other objects, for example, “Bring to front”. There are many more functions that do not directly relate to the drawing process, but help create blocks, diagrams, pictures.

As you can see, the possibilities of a graphic editor are limitless, and for those who have set themselves the task of learning how to draw in Word, many opportunities for improvement open up. Word is a beautiful text editor that can draw.
What should you do if you need a simple drawing, for example, for a document or presentation, but you don’t have Photoshop on your computer or you haven’t mastered Photoshop? From the point of view of computer literacy, the solution to this problem is the built-in graphic editor, which is found in the Microsoft (MS) Office package and, in particular, in the MS Word text editor. Yes, yes, the Word editor is a text editor, but nevertheless you can draw in Word!
First, we will describe in more detail the drawing process in Word 2003, and then briefly for Word 2007.
A toolbar is a kind of unique line with a set of buttons and other program controls that are used to execute user-defined commands for drawing graphic objects.
To activate given drawing toolbars inWord 2003 the user only needs
- select the "View" menu and
- Accordingly, check the box next to the “Drawing” option in the “Toolbar”.
After this, a drawing panel will appear at the bottom of the Word window. If you do not need this panel, uncheck the “Drawing” option.
In order to be able to draw any shape, you just need
- click the corresponding button on the previously displayed “Drawing Toolbar”,
- and then, holding down the left mouse button, you need to draw the required figure.
For selection necessary fill type space You need:
- click the arrow next to the following button: “Fill Color” located on the “Toolbar” – “Drawing;
- then select the required filling method and color;
- To confirm, press the “OK” button to complete the operation.
For removing already existing fills necessary:
- pre-select the graphic object needed in the work;
- click the arrow next to the following button: “Fill Color”, located on the “Toolbar” - “Drawing”;
- select the “No fill” button on the panel;
- Click the final “OK” button.
To change the line type and color necessary:
- pre-select the graphic object needed in the work;
- on the “Toolbar” “Drawing” you must select the following buttons “Line Type” or “Line Color”;
Using the buttons " Menu Shadow" And " Menu Volume» You can also add various shadows to automatic shapes and create a 3D effect. To do this you just need:
- pre-select the graphic object needed in the work;
- on the “Toolbar” “Drawing” you must select the following buttons “Shadow Menu” or Volume Menu;
- and then select the values required by the user from the lists presented in the menu.
In this way, numerous operations are performed with the “Drawing” panel in Word.
In Word 2007 There is no need to activate the drawing panel. It's in the menu " Insert» -« Figures" Select the required figure and, holding down the left mouse button, draw this figure, that is, stretch it to the size you need.
If you select the drawn figure, the “ Drawing Tools" in the upper right corner. Everything here is quite convenient in the sense that you have all the necessary tools at hand. By clicking on the “Drawing Tools” panel and opening it, you will get the entire arsenal of drawing tools, including color painting, “Shadow Effects” and “Volume”.
If necessary, you can always open “ ” and search there for the necessary information on your Word editor.